I had the pleasure of getting my hands on a PyBadge at PyCon 2019, thanks to the wonderful Nina.
She gave me a run through of how to get this piece of kit setup to be a lanyard, the process I will document here to hopefully help out others :)
Requirements
- PyBadge
- Desktop/Laptop [0]
- Known good text editor[1]
- Known good microUSB data cable[2]
[0] I use a 2015 MacBook Pro running OSX Mojave. This is important for both the Finder methods I describe for showing the external drives, and also because a USB-A to MicroUSB cable is much easier to find than a USB-C to MicroUSB, adapters aside.
[1] you need a text editor that does not stream data to file, but writes it in it’s entirely. CircuitPython’s auto-reload does not play nicely with some text editors. Try Visual Studio Code, or Mu
[2] your cable needs to write both data and provide power.
Process
Flash PyBadge
Making sure the bootloader on the device is good is a very important first step. Ensuring it is also the latest version available is also important to ensure any bugs that have been fixed in the interrum have been corrected.
- Download the latest CircuitPython (in my case, 4.0.0-rc.1)
- Connect your PyBadge to your laptop
- Double-click the
[RESET]button on the back of the board- a new volume will appear in Finder
- the badge face will show a cool interface showing that it’s in a different mode (in this case, the boot loader)
- Drag-and-drop the
.uf2file downloaded earlier to this volume.
Introspect code
We’ll be using Nametag by makermelissa
git clone this repo locally, then check out the top of the code.py file. It’ll show a bunch of import statements which relate to required libraries, some of which we need to import.
Acquire Libraries
At this point, there’s no good package management for CircuitPython, so this process is manual.
- Download the Bundle Version 4.x zip file
- Extract this zip file
Manual import
For each of the libraries from code.py, manually copy the relative files from the zip file into the /Volumes/CIRCUITPYTHON filesystem in a new folder called lib/
In our case:
adafruit_bitmap_font/adafruit_display_shapes/adafruit_display_text/neopixel.py
Onto the code
Finally, copy the fonts/ and code.py file from Nametag onto the /Volumes/CIRCUITPYTHON folder.
Spot check - file system
Your /Volumes/CIRCUITPYTHON should now look something like this:
code.py
fonts/
lib/
 - adafruit_bitmap_font/
 - adafruit_display_shapes/
 - adafruit_display_text/
 - neopixel.py
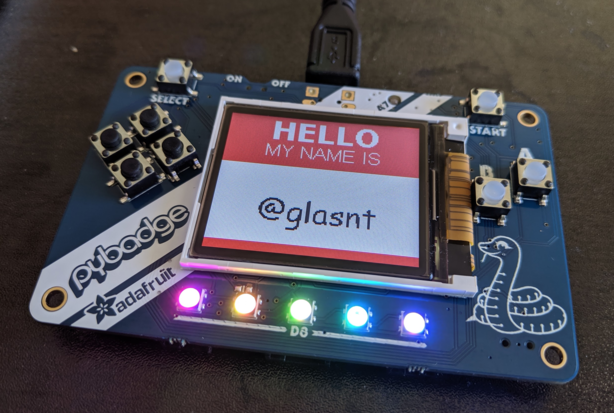
Magic~
The system will automatically reload, and given a few seconds to load the program, will provide a nametag
Customisation
Your name probably isn’t MakerMelissa, so you should change the NAME_STRING variable to your name.
You could also extend the app to do things with the LEDs. By default there’s a rainbow pattern, which can be decreased in brightness by pressing the [B] button on the board.
Personally, I want to do some hacking where I can have a one-click button to change the badge to show my current socialness. I’ve seen this done before, where there’s a badge of a piece of paper that can be manually changed from “I’m feeling social! Please talk to me!” to “Please let me be alone now”, or similar. Now, the major problem with this plan on the badge is that even if it says “Do not disturb” people will want to ask questions about the badge, but hopefully the message can come across.
Also, thinking about it more, it’d be awesome to have a counter of how many hours I’ve been “on”/”off”. Saving this data to the device would be useful (saving timestamp/s to file) to overcome any auto-reloading, and then I could also know how long I’ve been “on” for, without having to otherwise take note.
I’m a child of the FunWay era, and this project is absolutely reawakening my childlike wonder for electronics 💖